
Step by step guide how to add a performer parent listing
Take a look at these step by step instructions which take you through adding a performer parent listing to your account.
Hover over the image and click to enlarge to see annotated images showing how to fill in, edit, add detail and links.
Tips on how to fill in the forms and understand the listing management tool.
How get the most out of a listing on wcigt.com
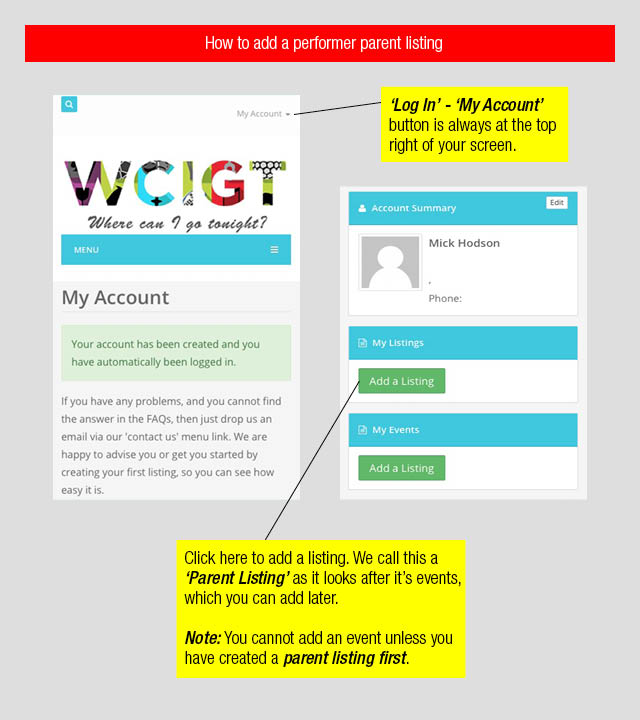
How to add a performer parent listing – step 1
A performer parent listing has to be created as events can only be added from a parent listing. First brief details to get started then later edit and add more. Hover over the image and click to enlarge to full size.
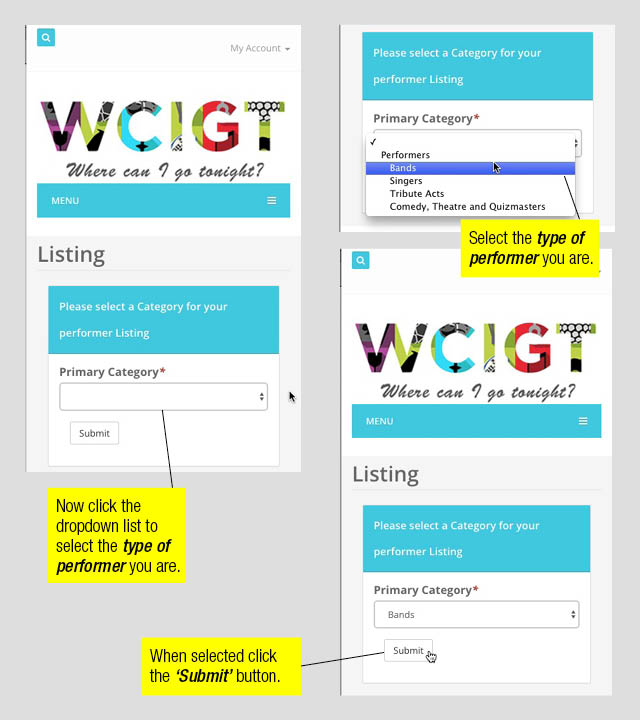
How to add a performer parent listing step 2
A performer parent listing needs the category that best fits your act. Select from the dropdown list and submit. Hover over the image and click to enlarge to full size.
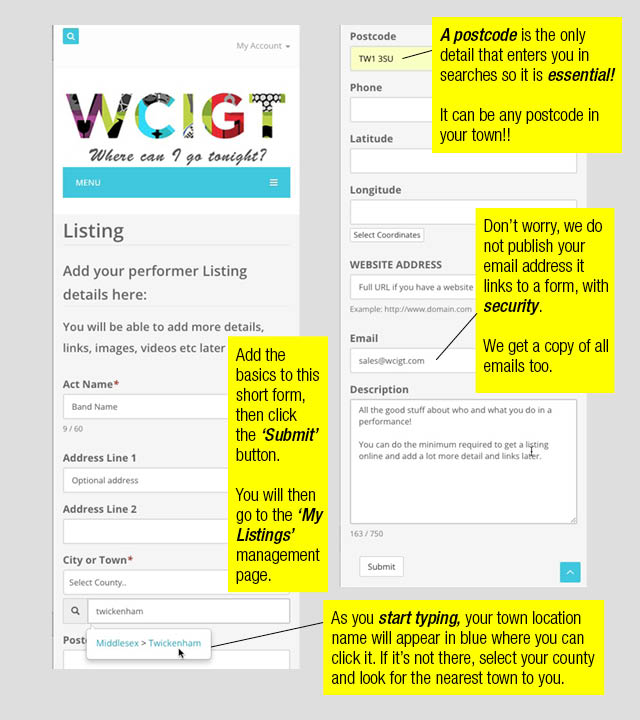
How to add a performer parent listing – step 3
This form requires a few important details to start off and more detail can be added later. the act name, town and postcode is minimum. The town name is used for searches and the postcode is essential for our wider radius searches. Hover over the image and click to enlarge to full size.
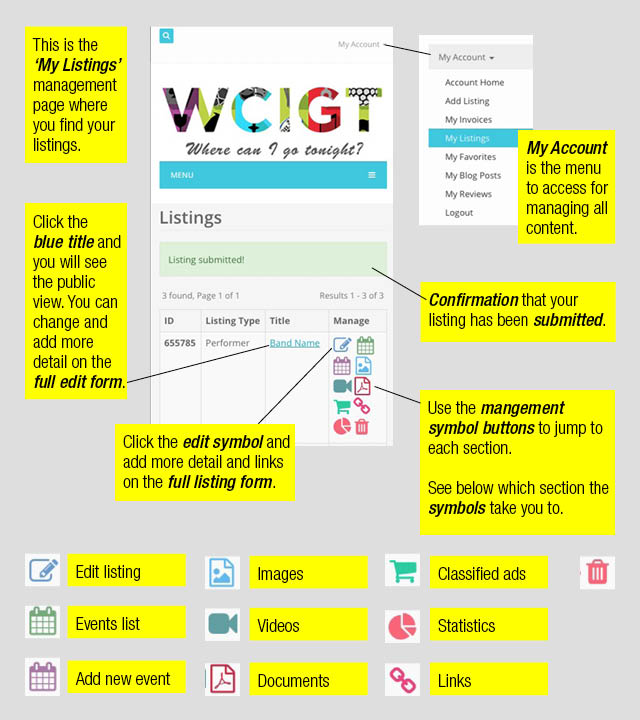
How to add a performer parent listing – step 4
My Account menu is access to everything. This screen shows the listing created and all the buttons you need to control your account. Click the purple calendar button to start a new event. Now go to the link below for events. Hover over the image and click to enlarge to full size.
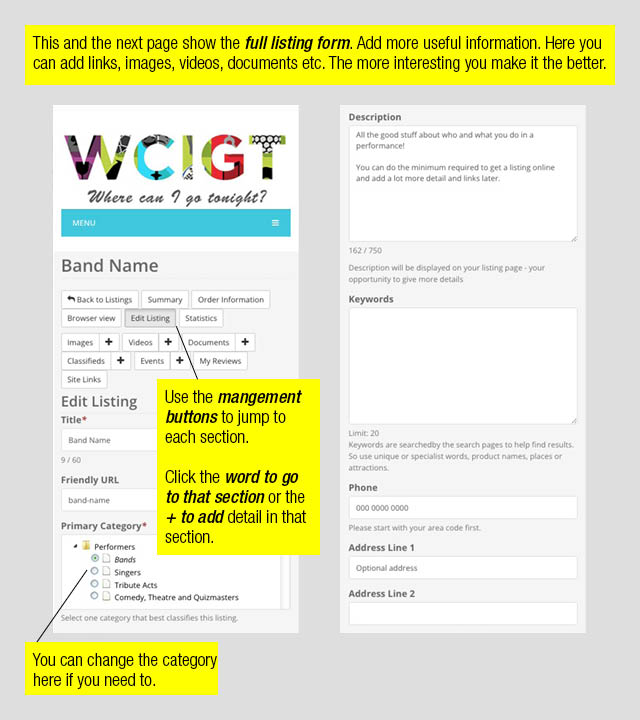
How to add a performer parent listing – step 5
This is the performer parent listing form here and on step 6. Now you can add or make changes. This is where you can add images, videos documents and more by selecting the relevant button. Hover over the image and click to enlarge to full size.
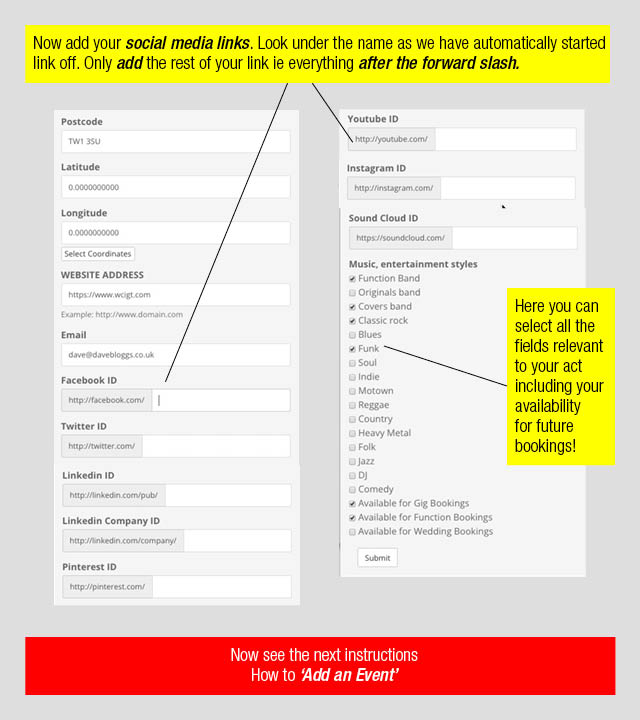
How to add a performer parent listing – step 6
Continuation of the performer parent listing form shows what other useful links and details can be added to increase interest in your listing. Hover over the image and click to enlarge to full size.
Take a look at our other step by step guides.