
Step by step guide how to add a venue event
An event can only be created if it has a ‘parent listing’ to add it from.
Take a look at these step by step instructions which take you through adding a venue event to your listing.
Hover over the image and click to enlarge to see annotated images showing how to fill in, edit, add detail and links.
Tips on how to understand all the information needed, and how get the most out of an event on wcigt.com

How to add an event as a venue member – Step 1
Find your listing from the My Account menu and click either of the two add events buttons as shown. Hover over the image and click to enlarge to full size.
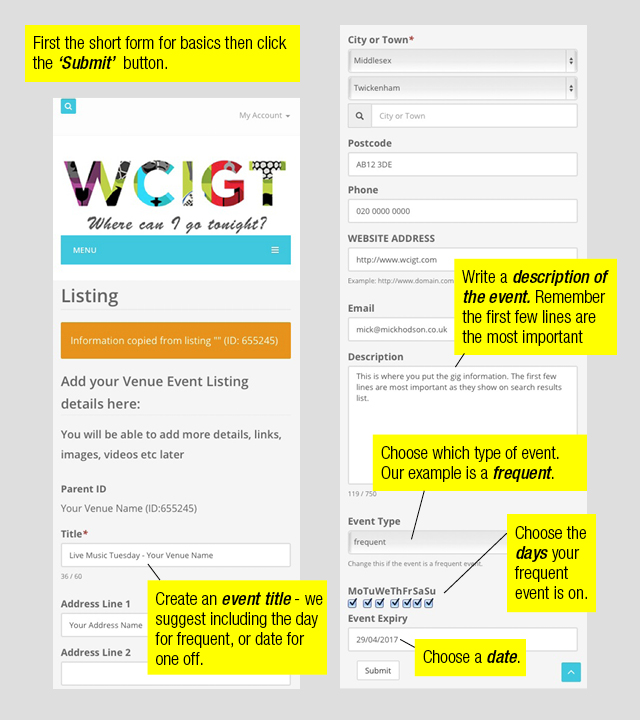
How to add an event as a venue member – Step 2
Fill in the short form, then submit. Next edit the event to add more details and links. Hover over the image and click to enlarge to full size.
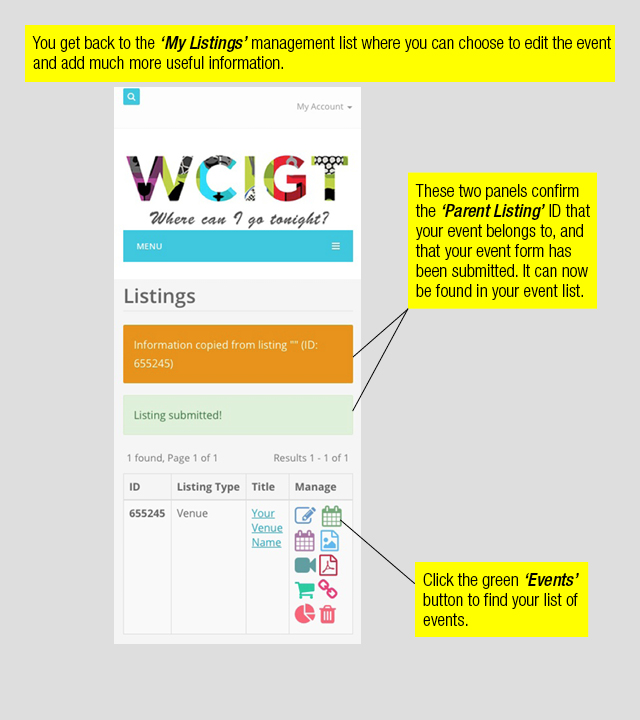
How to add an event as a venue member – Step 3
Find your listing from the My Account menu and click the green events button to edit the event. Hover over the image and click to enlarge to full size.

How to add an event as a venue member – Step 4
This is the event listing where you find the green button to edit the event. Hover over the image and click to enlarge to full size.
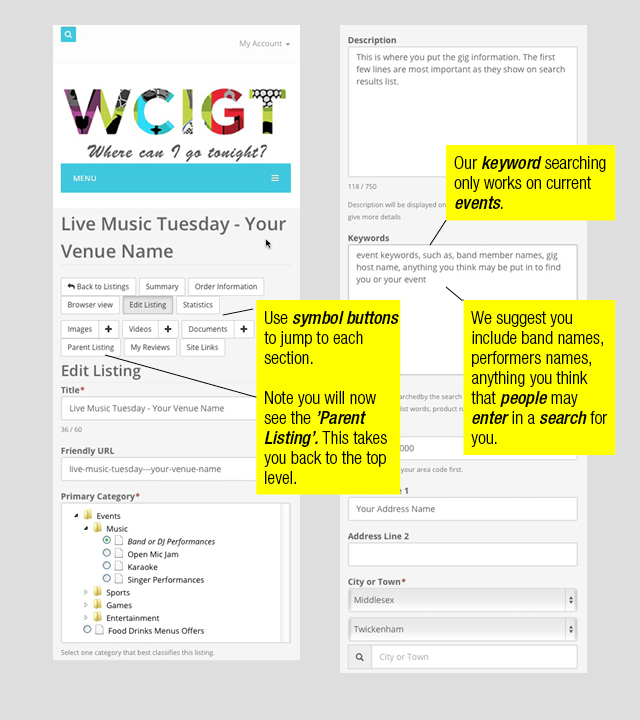
How to add an event as a venue member – Step 5
Important help on how to navigate an event listing form. Hover over the image and click to enlarge to full size.
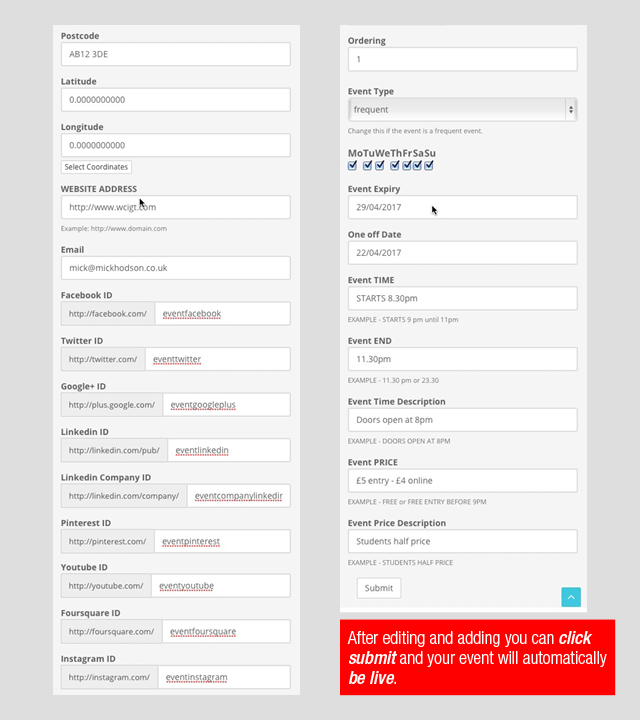
How to add an event as a venue member – Step 6
The links and event details that can be added. The more added the better! Hover over the image and click to enlarge to full size.
Take a look at our other step by step guides.